Maverick and Comet Repair
FRONT WHEEL BEARINGS - REMOVAL, REPACKING AND INSTALLATION
The procedure for cleaning, repacking and adjusting front wheel bearings on vehicles equipped with self-adjusting drum brakes is as follows:
- Taking proper safety precautions, raise the car until the wheel and tire clear the floor. Install jack stands under the lower control arms.
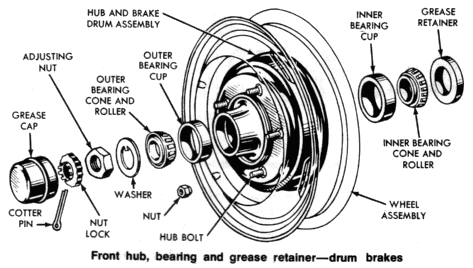
- Remove the wheel cover. Remove the grease cap from the hub. Then remove the cotter pin, nut lock, adjusting nut, and flat washer from the spindle. Remove the outer bearing cone and roller assembly.
- Pull the wheel, hub and drum assembly off the spindle. When encountering a brake drum that will not come off, disengage the adjusting lever from the adjusting screw by inserting a narrow screwdriver through the adjusting hole in the carrier plate. While the lever is disengaged, back off the adjusting screw with a brake adjusting tool. The self-adjusting mechanism will not function properly if the adjusting screw is burred, chipped or otherwise damaged in the process, so exercise extreme care.
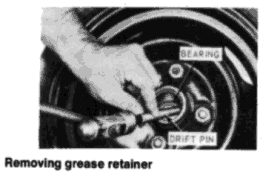
- Remove the grease retainer and the inner bearing cone and roller assembly from the hub. Removing grease retainer.
- Clean all grease off from the inner and outer bearing cups with solvent. Inspect the cups for pits, scratches, or excessive wear. If the cups are damaged, remove them with a drift.
- Clean the inner and outer cone and roller assemblies with solvent and shake them dry. If the cone and roller assemblies show excessive wear or damage, replace them with the bearing cups as a unit.
- If the new grease retainer is of leather, soak it in light engine oil for 30 minutes, prior to installation. Wipe any excess from the metal portion of the retainer. Clean the spindle and the inside of the hub with solvent to thoroughly remove all old grease.
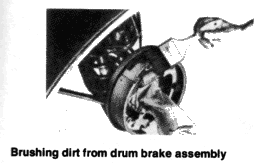
- Covering the spindle with a clean cloth, brush all loose dirt and dust from the brake assembly. Remove the cloth carefully so as to not get dirt on the spindle.
- If the inner and/or outer bearing cups were removed, install the replacement cups on the hub. Be sure that the cups seat properly in the hub.
- It is imperative that all old grease be removed from the bearings and surrounding surfaces before repacking. The new lithium base grease is not compatible with the sodium base grease used in the past.
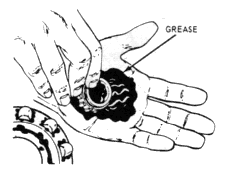
- Pack the inside of the hub with wheel bearing grease. Add grease to the hub until it is flush with the inside diameter of both bearing cups. Work as much grease as possible between the rollers and cages in the cone and roller assemblies. Lubricate the cone surfaces with grease.
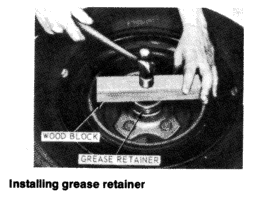
- Position the inner bearing cone and roller assembly in the inner cup. If a leather grease retainer has soaked for 30 minutes, wipe all excess from the metal portion of the retainer and install. Other grease retainers require a light film of grease on the lips before installation. Using a wooden block to evenly distribute the blow of a hammer, install the retainer. Make sure that the retainer is properly seated.
- Install the wheel, hub, and drum assembly on the wheel spindle. To prevent damage to the grease retainer and spindle threads, keep the hub centered on the spindle.
- Install the outer bearing cone and roller assembly and the flat washer on the spindle. Install the adjusting nut.
- Adjust the wheel bearings by tightening the adjusting nut to 17-25 ft. lbs. with the wheel rotating to seat the bearing. Then back off the adjusting nut 1/2 turn. Retighten the adjusting nut to 10-15 ft. lbs. Install the locknut so that the castellations are aligned with the cotter pin hole. Install the cotter pin. Bend the ends of the cotter pin around the castellations of the locknut to prevent interference with the radio static collector in the grease cap. Install the grease cap.
- Remove the adjusting hole cover from the carrier plate and, from the carrier plate side, turn the adjusting screw starwheel upward with a brake adjusting tool. Expand the brake shoes until a slight drag is felt with the drum rotating. Replace the adjusting hole cover.
- Install the wheel cover.
