Relocating Seat Tracks
After I recovered the bucket seats and replaced the seat buns in my 63 hardtop I found myself sitting closer to the steering wheel instead of sinking down in the seat. I needed a way to move my seat back another inch or two without modifying the floor pan or seat tracks. After searching the internet for images of seat track extensions and talking to a forum member on TFFN who had done something similar I came up with my idea of making an "adapter plate" using 1-1/4 in.-3/16 in.x15 in. flat stock. Matter of fact, the way I did this is very close to what Ron did to his Ranchero, the only difference is I went 2 inches whereas Ron went 4 inches and he had a built-in rear pedestal by bending the metal down and another bend going back to the front to make a "foot". By going only 2 inches the rear of the outer seat track will be only a half inch from the raised hump on the floor pan and eliminated the need for an extra floor-to-track spacers.
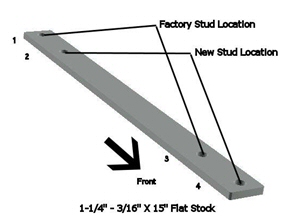
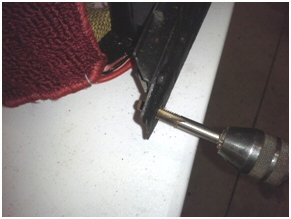
Starting from the rear of the adapter plate, closest to the back seat, measure for the 4 holes that will be drilled in the adapter plate.
- 1st Hole is 1/2 in. from edge, countersink the bottom of this hole
- 2nd Hole is 2 in. from 1st hole, countersink the top of this hole
- 3rd Hole is 12-1/8th in. from 2nd hole, countersink the bottom of this hole
- 4th Hole is 2 in. from 3rd hole, countersink the top of this hole
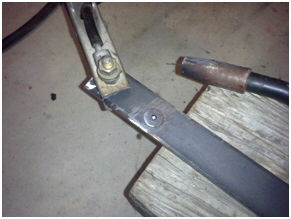
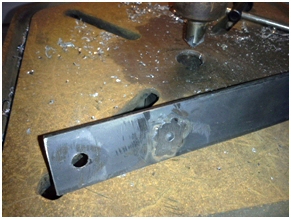
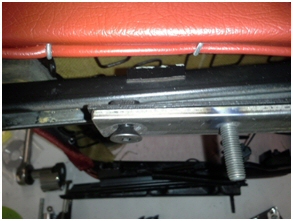
The two outer adapter plates will get the 1-1/4 in. flat head bolts, the two inner adapter plates gets 2-1/2 in. bolts so they be long enough to pass through the factory pedestal spacer. These bolts go in the 2nd Hole and are weld in place then grind the weld smooth. The reason is because there's no way to get a tool on the bolt head once installed. These bolts will go through the rear holes in the floor pan.
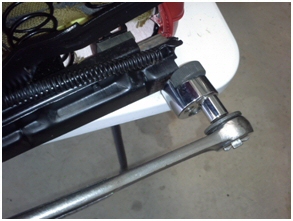
Remove the studs from the seat tracks with a stud extractor or vise-grips. Notice the stud has fine threads going through the floor pan and course thread going through the seat track. Chase the threads in the seat tacks with a 5/16"-18 tap to clean up the threads. Two 5/16 in.-18 x 3/4 in. flat head bolts will attach the adapter to each seat track.
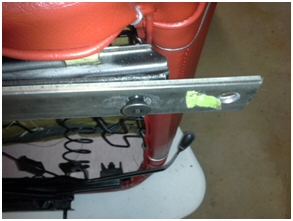
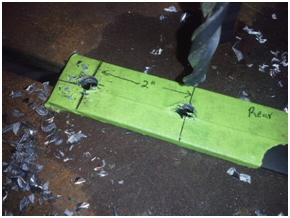
After everything was mocked up, I removed the adapter plate, cleaned them up in the blasting cabinet and painted with rust protection to prevent carpet stains. A drop of Loctite was added to the threads before bolting the adapter to the seat track. 5/16 in.-18 x 1-1/4 in. flat head bolts (not shown in photo) were used to attach the front of the adapter to the floor pan. The green masking tape in the last photo was used to temporary distinguish between the front and back of the adapter when countersinking holes.
Shopping List / Tools Needed
| 1-1/4 in.-3/16 in.x15 in. flat stock...4 pc | Grinder |
| 5/16 in.-18 in. x 3/4 in. flat head bolts...8 pc | Center Punch and Hammer |
| 5/16 in.-24 in. x 1-1/4 in. flat head bolts...4 pc | Drill & Drill Bit |
| 7/16 in.-24 in. x 2-1/2 in. flat head bolts...4 pc | Countersink Bit |
| 5/16 in.-18 Tap | Allen Wrench |
| Stud Extractor | 1/2 in. Deep Well Socket |
| Tape Measure | Ratchet |
| Masking Tape and Ink Pen | Loctite |
| Welder | Paint |